Every Day We Fight mission objectives
Every Day We Fight: destroy protected Sabotage consoles
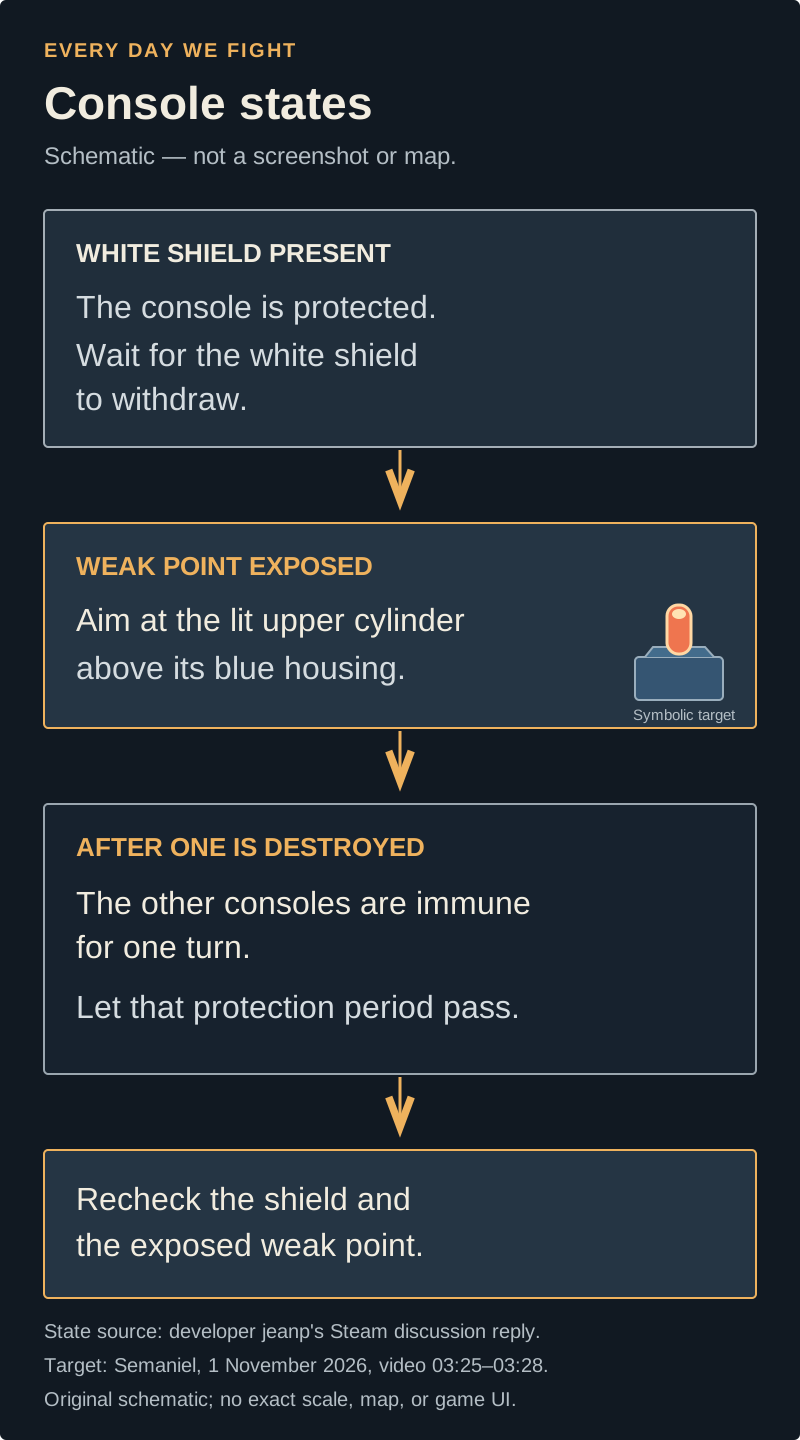
No grenades are needed for the exposed-point route. Aim at the glowing red/orange upright cylinder on top of the low blue console housing, after its white protection has receded. Destroying one console makes the others immune for one turn: wait for the exposed point again before spending another shot.
Use this guide for the Heat-lowering Sabotage with three antenna consoles. A Harvester's Power Cores and a Rifter's regenerating shield use different checks.
Running out of grenades does not force a restart. An ordinary gun can destroy a console when its weakpoint is exposed; shots at its protected housing do not establish that bullets are ineffective.
On this page
Check the mission before choosing a fix
Sabotage begins by hacking the antenna. The observed mission then asks you to survive waves to reduce Heat and destroy three targets to stop reinforcements. This is separate from the Heat-increasing Ambush, where moving away from the antenna controls whether another wave is called.
The English Steam discussion calls the targets consoles. The current Spanish footage first calls the three targets antenas, then explicitly uses consola in its wait-for-vulnerability instruction. This guide uses antenna consoles so you can distinguish the destructible targets from the antenna you hacked to start the encounter.
Hacking is the activation step. Inspect the target afterward and fire only when its upper point is exposed; the evidence does not establish an initial fixed shield timer or promise that every shield retracts instantly on the hack.
Choose the next action by the visible state
| Current state | Next action | What to look for |
|---|---|---|
| Sabotage has not started | Hack the marked antenna to activate the encounter. | The objective changes to waves and three destructible targets. |
| A console is protected | Stop firing into the closed/protected housing. If another console just died, let its one-turn protection resolve. | White protection recedes and the small upper weakpoint is exposed. |
| The upper weakpoint is exposed | Take manual aim at the glowing red/orange cylinder above the console housing and fire a gun. | The target breaks; the remaining targets enter the protected/wait state. |
| One console has just been destroyed | Use the protected turn to handle enemies, reload or line up the next target. Recheck before firing. | At the next Thorn turn in the observed sequence, the objective returns to destroying a console; check for the exposed point before shooting. |
| All three targets are destroyed | Finish the remaining Rifters required by the objective. | The instruction changes to clearing the remaining enemies, followed by the combat-zone-completed result. |
A gun works without a grenade fallback
At 03:25.5-03:27.5 in the 1 November footage, the player aims a normal gun at the lit upper cylinder and fires. Ammunition falls from 9 to 8 and the console breaks. The objective then says to wait for another console to become vulnerable. At 04:36, the next Thorn turn again asks for a console to be destroyed; a second shot at 04:41 is followed by the same wait state.
In the original thread, the questioner reported completing the encounter with a Roaster flamethrower despite unclear health-bar movement. That is a useful player report, but it does not prove that bullets cannot damage consoles. Developer jeanp's reply and the later gun footage establish the exposed-point route. This page does not promise that every weapon or every shot angle works.
What changes Heat in this encounter
The observed Sabotage objective says a survived wave reduces Heat by one. Destroying all three antenna consoles stops reinforcements; it is not a claim that each destroyed console directly subtracts one Heat. After the last target, the instruction changes to finishing the remaining Rifters. In this footage, that is followed by the combat-zone-completed screen.
The 1.0 marketing announcement reverses the Ambush/Sabotage descriptions. This guide follows the actual mission UI in November footage, the release-day gameplay explanation and the mission Codex. If your installed build shows different objective text, use that text and record the build before applying this route.
If it does not work
- No damage and white protection remains: check whether you just destroyed another console. The remaining targets have one turn of immunity; repeatedly shooting them does not shorten it.
- No damage with the weakpoint visible: make sure the reticle is on the small glowing upper cylinder, with a clear line of fire, rather than the broad blue body or cover in front of it.
- Wrong objective: Harvester Power Cores have an escape countdown and their own temporary defenses. A shielded Rifter is an enemy, not this console state.
- No grenades left: use the exposed-point gun route. The evidence does not require a grenade purchase, a flamethrower drop or restarting the run.
- State never becomes readable: preserve your current save if available and note the build, target and turn sequence. Do not assume that a historical fixed bullet bug explains every current no-damage case.
How to tell it worked
All three antenna-console targets are destroyed and any remaining Rifters required by the objective are defeated. The observed sequence changes from console destruction to clearing enemies, then shows the combat zone completed.
For the Heat-lowering branch, watch the Heat display after surviving a wave; the objective states a reduction of one. A stationary-looking console health bar alone is not a reliable completion check.
Sources & version
Steam / Windows PC scope. A developer reply dated 24 October 2026 and PC Sabotage footage published 1 November 2026 after the 1.0 release support this guide. The footage uses Spanish UI and does not display an exact build. No personal playtest or all-later-build guarantee.
- Original Steam question and all three replies - 24 October 2026 — Full OP and replies reread on 2 November. Jeanp's developer reply was posted at 12:51:49 UTC. It confirms the exposed weakpoint and one-turn immunity after another console dies. The OP's Roaster completion is a player report.
- Semaniel - Completing City Missions, 1 November 2026 — Actual PC frames: 01:52 before hacking; 01:59 changed objectives; 03:25.5 upper weakpoint; 03:27.5 gunshot, break and wait instruction; 04:36 next Thorn turn; 04:41 second shot; 04:43 wait again; 04:59 last target and clear-enemies instruction; 05:04 combat completed. Spanish UI, exact build unknown. Research captures stay local; the public image is an original schematic.
- Mission Codex reference — IndieTome — Full reference checked on 2 November. Supports the Sabotage activation and target workflow; its exact capture build and date are not declared.
- ChristopherOdd - 1.0 release-day gameplay, 22 October 2026 — Commentary at 06:04 and the Ambush objective at 06:15-06:37 independently establish Ambush increasing Heat and Sabotage lowering it. Console geometry is verified in the separate Semaniel footage.
Source check: 2026-11-02. See our source and version policy.